Kitchen Products
Creative Ideas for Hanging Pots and Pans on Wall at Home
Jul
Hanging your cookware on the wall is a game-changer for modern kitchen organization, instantly freeing up cramped cabinets while turning everyday tools into striking culinary decor. Whether you are dealing with a compact urban apartment or a sprawling culinary space, vertical storage transforms dead wall space into efficient, accessible infrastructure. This comprehensive guide explores creative, practical ways to mount your pots and pans securely, elevating both your kitchen’s workflow and its aesthetic appeal.
Why Vertical Cookware Storage is Essential for Modern Kitchens
Traditional kitchen layouts often relegate heavy pots, skillets, and saucers to deep, dark base cabinets where items stack haphazardly and cause daily frustration. Transitioning to wall-mounted storage eliminates the physical strain of bending down and rummaging through cluttered stacks.
When your most frequently used cookware hangs right at eye level or within arm’s reach, meal preparation speed increases dramatically. Furthermore, keeping heavy iron and stainless steel pieces off cabinet shelves preserves the structural integrity of your furniture, preventing sagging shelves and scratched coatings. Vertical storage also promotes better air circulation around washed cookware, ensuring moisture evaporates completely before the next use.
Selecting the Right Hardware for Your Wall Structure
Before hammering a single nail into your kitchen wall, you must evaluate your wall’s underlying material to ensure it can support heavy cast iron and multi-ply stainless steel cookware. Drywall, brick, tile, and concrete each require specific anchoring techniques.
- Drywall and Plaster: Always locate wooden studs using an electronic stud finder for heavy rails. If studs are misaligned, use heavy-duty toggle bolts or drywall anchors rated for at least 50 pounds.
- Tile and Backsplash: Avoid drilling directly through the center of delicate ceramic or glass tiles if possible; instead, target the grout lines. Use specialized masonry drill bits at low speeds to prevent cracking.
- Brick and Concrete: These masonry surfaces offer incredible weight capacity but require a hammer drill and plastic masonry anchors alongside concrete screws.
Top Creative Ideas for Hanging Pots and Pans on Walls
Transforming a bare kitchen wall into a functional masterpiece requires matching your hardware choices to your spatial constraints and aesthetic preferences. Here are the most effective configurations for modern homes.
1. Minimalist Wall-Mounted Rails
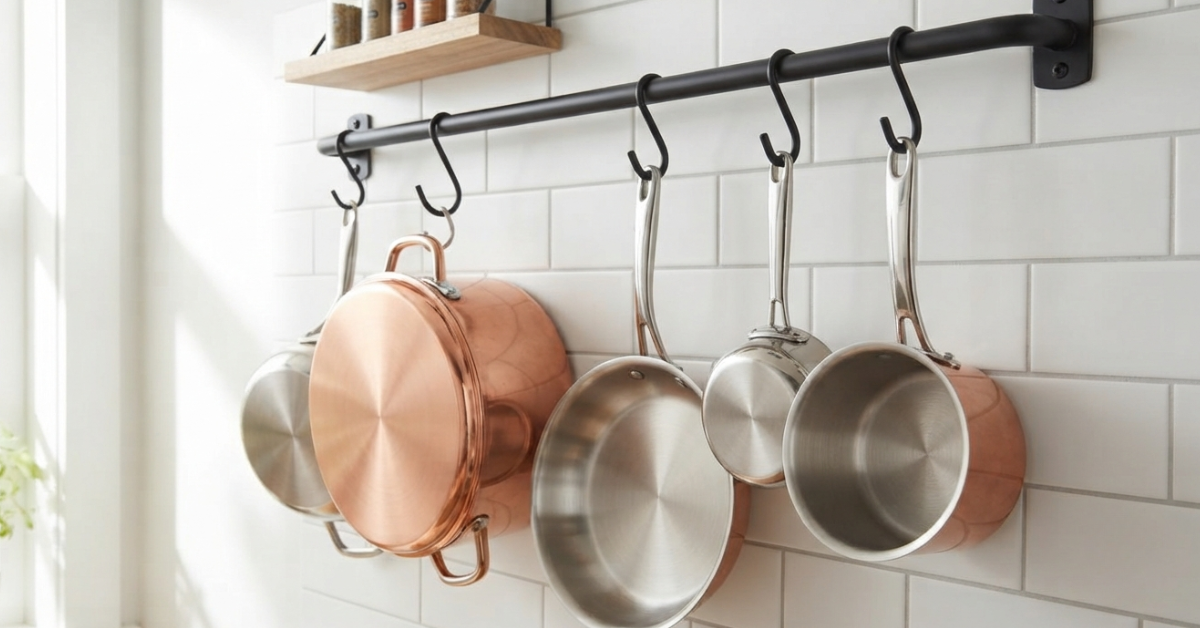
Linear metal rails installed along an empty backsplash or an accent wall provide a sleek, streamlined profile. You can hang various items using a wall-mounted rail paired with S-hooks. This setup allows you to slide pots and pans horizontally to adjust spacing as your cookware collection evolves. Stainless steel or matte black rails blend seamlessly into industrial, Scandinavian, and contemporary kitchen designs.
2. Pegboard Customization Systems
Metal or high-density wood composite pegboards offer unmatched versatility for kitchen walls. Because you can reposition pegs and hooks at a moment’s notice, pegboards accommodate irregularly shaped pots, pot lids, and specialized baking sheets with ease. Paint the pegboard a contrasting color to your kitchen walls to create a striking geometric backdrop that frames your culinary gear like art pieces.
3. Dedicated Pan Lid and Accessory Grids
Lids are notoriously difficult to store alongside their corresponding pots. Installing specialized lid holder grids directly beneath or adjacent to your main pan hooks keeps matching sets unified. This layout prevents frantic searching during active cooking sessions and maximizes the utility of narrow wall vertical strips.
4. Heavy-Duty Hanging Racks for Cast Iron
Cast iron skillets require robust support systems due to their substantial weight. Utilizing a heavy-gauge hanging plate hook rack or reinforced structural bar ensures safety and stability. Position these near your stove or prep station so heavy Dutch ovens and skillets are never more than an arm’s reach away.
Step-by-Step Installation Guide for Wall-Mounted Racks
Executing a clean, secure installation prevents accidents and ensures your kitchen investment lasts for years. Follow this systematic workflow to achieve professional results.
Step 1: Inventory and Weight Assessment
Gather all the pots, pans, and lids you intend to hang. Weigh heavy cast iron pieces individually to calculate the total maximum load your wall system must support. Select a rail or rack system rated well above this total weight calculation.
Step 2: Height and Ergonomic Mapping
Hold your chosen rail or rack against the wall at various heights. The ideal height keeps your heaviest everyday pans at chest or waist level, requiring minimal reaching or straining. Use a pencil to mark the bracket screw holes.
Step 3: Leveling and Pilot Holes
Place a spirit level across your pencil marks to ensure the mounting line is perfectly horizontal. Drill pilot holes corresponding to your chosen wall anchors. Insert the anchors firmly until they sit flush against the wall surface.
Step 4: Securing the Framework and Testing
Drive the mounting screws through the rail brackets into the anchors or studs, tightening them securely. Before loading your cookware, firmly pull down on the rail to test its rigidity and ensure zero wobbling.
Maximizing Small Kitchen Spaces with Vertical Storage
In compact or galley kitchens, every square inch of horizontal counter space is precious. Hanging pots and pans off the walls shifts bulk out of your footprint entirely, creating an optical illusion of a larger, more breathable room.
When working with tight layouts, utilize vertical corners rather than flat runs. Corner zones are traditionally dead space, but installing a compact hanging configuration turns them into high-density storage zones. Combine your pan storage with a multi-function rack nearby to hold smaller cooking utensils, oils, and spices in one consolidated vertical zone.
Common Mistakes to Avoid When Hanging Cookware
Even experienced DIY enthusiasts can run into pitfalls when designing a wall-mounted kitchen storage system. Keeping these common errors in mind will save you time, money, and potential wall damage.
- Ignoring Total Weight Limits: Hanging heavy multi-piece cast iron sets on standard adhesive hooks or light drywall screws almost always results in structural failure. Always anchor directly into studs or use heavy-duty hardware rated for masonry.
- Mounting Too High: Placing your pan rack near the ceiling might look impressive, but if you need a step stool to reach your daily skillet, the system fails the everyday usability test. Keep frequently used items within comfortable reach.
- Overcrowding the Rail: Jamming too many pans onto a single rail creates visual clutter and makes it frustratingly difficult to lift a single pan without knocking others loose. Leave at least two inches of breathing room between items.
- Neglecting Wall Protection: Constant friction between metal pan bottoms and unpainted drywall will eventually scuff and gouge your walls. Consider placing clear protective acrylic panels or matching tiles behind your hanging zone.
Maintenance, Cleaning, and Care Tips
Kitchen walls accumulate airborne grease, moisture, and dust over time, especially when pots and pans are stored near cooking ranges. Maintaining your wall storage system requires a simple routine upkeep plan.
Wipe down your wall rails and hooks monthly using a microfiber cloth dampened with warm water and mild dish soap. Avoid harsh abrasive pads that scratch metallic or painted finishes. Periodically inspect the mounting screws and anchors to ensure that continuous heavy lifting hasn’t loosened the hardware. Tighten any loose screws immediately to maintain optimal safety.
Organizing Pans by Frequency of Use
An efficient kitchen workflow relies heavily on strategic placement hierarchy. Do not treat your wall display as a random assortment; instead, organize your cookware by cooking frequency.
- Primary Tier (Eye Level): Reserve your daily workhorses—such as your standard 10-inch skillet, medium saucepan, and everyday saute pan—for the most easily accessible hooks right in the center of the wall.
- Secondary Tier (Upper/Outer Edges): Place specialty items used weekly—like stockpots, griddles, and woks—slightly higher or towards the outer edges of the rail system.
- Seasonal or Decorative Tier: Heavy Dutch ovens or decorative copper pieces that see occasional use can anchor the upper ends of your display, adding architectural interest without blocking your immediate workflow.
Integrating Wall Storage with Overall Kitchen Aesthetics
Beyond raw utility, a well-curated wall display acts as a focal point for your interior design style. Harmonize your cookware finishes with your kitchen hardware, faucet fixtures, and cabinet pulls.
If your kitchen features matte black cabinet handles, choose matching black rails and hooks to create a cohesive, unified design language. For warm, rustic kitchens, unlacquered copper or brushed brass rails paired with traditional stainless steel or copper-bottomed cookware introduce an inviting, organic warmth. Keep the surrounding wall paint neutral—such as soft cream, warm greige, or crisp white—to allow the metallic textures and rich tones of your cookware to stand out cleanly.
Future Trends in Kitchen Wall Organization
Kitchen interior design continues to evolve toward hyper-personalized, modular storage solutions. As urban homes shrink in square footage, intelligent modular infrastructure is replacing bulky stationary cabinetry.
Emerging trends feature integrated LED backlighting embedded directly behind wall rails, casting a soft glow over suspended cookware and illuminating dark backsplash zones. Smart magnetic strips with weight sensors and modular snap-in brackets are also gaining popularity, allowing homeowners to reconfigure their entire wall layout in seconds without tools. Embracing these flexible systems ensures your kitchen remains modern, efficient, and adaptable for years to come.
Properly executed wall storage transforms a cluttered cooking space into an ergonomic, visually stunning culinary sanctuary. By evaluating your wall structure, selecting heavy-duty hardware, and organizing your cookware with purpose, you unlock both maximum floor space and effortless daily cooking efficiency.
Final Footer Block
Next Steps & Resource Directories
- Browse Full Directories:
- Kitchen Museum Product Hub > Kitchen Storage & Hardware Catalog
Related Articles
- Wall Mounted Spice Rack on Wall for Smart Kitchen Storage
- Three Burner Gas Stove on Wall: Space-Saving Kitchen Ideas
- Flexible Kitchen Tap on Wall: Best Choice for Every Home
- Best Kitchen Sink Accessories & Steel Dish Rack Price in Bangladesh
