
Kitchen Cabinet
Upper Cabinet for Laundry Room: Stylish Storage Solutions
Jul
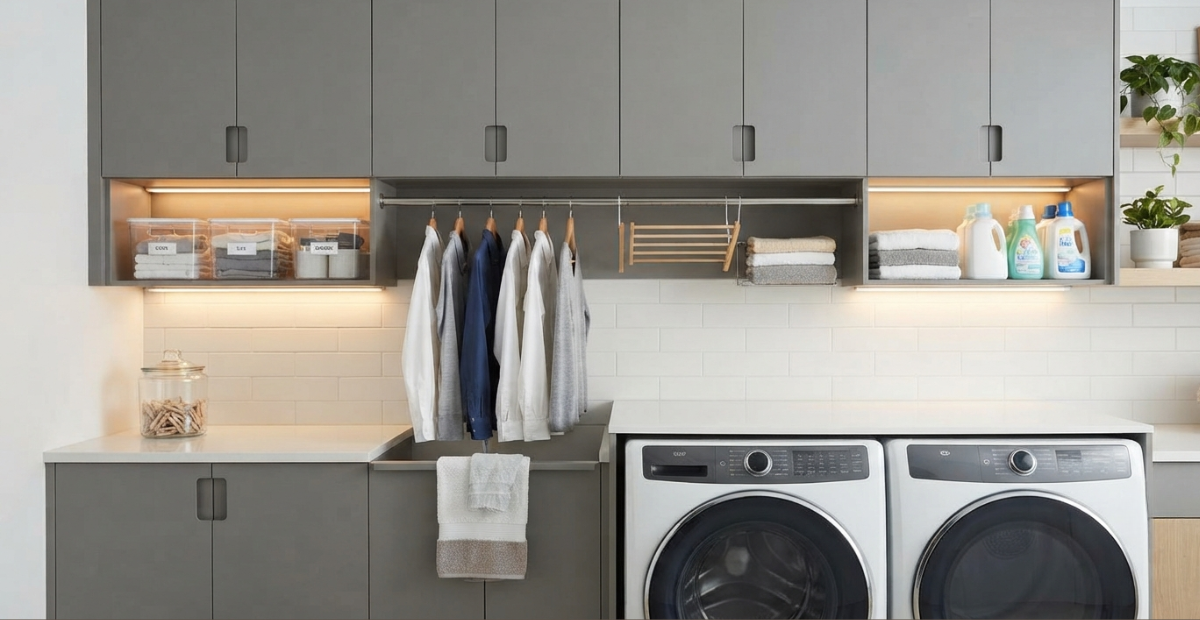
Transforming a chaotic laundry area into a high-performance workspace requires capitalizing on unused vertical real estate. Installing an upper cabinet for laundry room layouts instantly clears counter clutter, isolates dangerous detergents from children, and optimizes workflow ergonomics. This comprehensive blueprint details structural configurations, styling approaches, and internal organization systems to maximize your vertical laundry storage.
The Immediate Value Blueprint for Overhead Laundry Layouts
To unlock the full potential of your walls, you must combine heavy-duty storage with quick-access hardware. The ideal setup utilizes deep upper cabinets paired with lower high-frequency utility components.
+————————————————————-+
| CEILING-HEIGHT UPPER CABINETS |
| (Bulk Detergents, Seasonal Linens, Back-up Supplies) |
+————————————————————-+
| MID-LEVEL OPEN SHELVING |
| (Daily Stain Removers, Ironing Sprays) |
+————————————————————-+
| INTEGRATED UTILITY HANGING ROD |
| (Freshly Ironed Shirts, Air-Drying Items) |
+————————————————————-+
| WASHER / DRYER COUNTERTOP SURFACE |
+————————————————————-+
1. Structural Load Assessment
Verify that wall studs can support the weight of structural cabinetry filled with heavy liquid detergents and iron bases. Always secure laundry room wall cabinets directly into structural studs using heavy-duty cabinet screws.
2. Clearance Optimization
Maintain a minimum clearance of 18 to 24 inches between the top of your washer/dryer unit and the bottom of the lower cabinet rail. This clearance ensures comfortable reach while preventing operational vibrations from disturbing cabinet doors.
3. Ergonomic Depth Configurations
Standard upper cabinets measure 12 inches deep, but laundry room configurations benefit from depths up to 15 inches to accommodate larger bulk detergent boxes and clean laundry baskets. Ensure the depth allows you to comfortably reach the back without straining over front-loading machines.
Strategic System Selection for Vertical Storage
Selecting the correct cabinetry configuration depends entirely on the square footage and architecture of your laundry zone. Different environments demand specialized approaches to keep items accessible.
Standard Wall Cabinets
Traditional swinging doors offer a clean, uniform look that completely hides messy supply bottles from view. These units work exceptionally well in dedicated utility rooms where swing clearance is not an impediment.
Open-Front Shelving Cubbies
For high-traffic, tight spaces, open shelving eliminates the physical footprint of swinging doors. It provides immediate visual access to items, though it requires strict organization to maintain a tidy appearance.
Over-the-Appliance Bridges
Bridge units connect two taller side towers, spanning directly across the top of your washer and dryer. This layout maximizes every square inch of space and creates a cohesive, built-in aesthetic.
Comprehensive Accessory Optimization Directory
Maximizing your upper cabinet for laundry room storage requires upgrading the interior layout with dedicated hardware. The following matrix illustrates how specific accessories optimize different room scales and organizational challenges.
| Accessory Type | Best For | Key Benefit | Ideal Room Size |
| Pull-Out Basket | Base cabinets & larders | Easy access to deep items | Small to Medium |
| Upper Cabinet | Laundry rooms & kitchens | Uses vertical wall space | Any Size |
| Drawer Organizer | Cutlery & small utensils | Eliminates clutter completely | Any Size |
| Chimney Hood | Above cooking stoves | Removes grease and odors | Medium to Large |
Integrating specialized internal organizational systems turns basic storage boxes into hard-working components. For example, installing a premium three-shelf pull-out mechanism within narrow cabinet frames allows you to easily pull your stain treatment sprays and fabric conditioners directly into view.
Similarly, utilizing an internal two-shelf pull-out system ensures that even shorter household members can access deeper items without relying on step stools. For lightweight towels or delicate drying cloths, mounting a sleek perfume rack wire assembly on the inside of a cabinet door creates secondary storage out of previously wasted dead space.
Critical Installation and Ergonomic Metrics
Precision planning during the drafting phase prevents frustrating usability issues down the road. Use these benchmark measurements to plan your overhead laundry organization layout.
Cabinet Height Placement
Mount the top edge of your cabinets at 84 inches or 90 inches from the finished floor line to match standard architectural sightlines. This ensures that the lower shelves remain accessible without assistance.
Door Style Considerations
In ultra-narrow laundry closets, opt for sliding tracks or lift-up hydraulic doors rather than traditional side-hinged doors. This design keeps walkways completely unobstructed when transferring wet clothes to the dryer.
Moisture and Venting Protection
Laundry spaces experience high humidity levels from drying cycles. Ensure all upper cabinetry features moisture-resistant finishes like marine-grade plywood cores or thermofoil laminates to prevent warping.
Pro Tip: Leave a 2-inch gap between the side profile of your upper cabinets and any adjacent dryer exhaust vents to prevent heat transfer and localized humidity accumulation.
Advanced Internal Organization Strategies
An empty cabinet box often becomes a graveyard for half-empty bottles. Implementing internal organization structures turns standard overhead storage into an efficient processing station.
- Categorized Clear Bins: Group items by function, such as stain pre-treatment, delicate fabric wash, and structural cleaning supplies. Use transparent bins with handles for easy retrieval.
- Integrated Hanging Rods: Install a robust hanging rod directly underneath your upper cabinets. This creates a space to dry delicate garments straight out of the washing machine.
- Adjustable Shelf Pegs: Avoid fixed shelving. Utilize tight-interval adjustable peg systems so you can modify shelf heights when bottle sizes change.
Common Layout Mistakes and Tactical Fixes
Avoid these frequent design pitfalls to ensure your vertical storage system remains functional for years to come.
Mistake 1: Ignoring Appliance Depth
Many homeowners buy standard 12-inch cabinets but push their deep front-load washers directly underneath them. This forces you to lean uncomfortably forward over the machines to reach the cabinets.
- The Fix: Pull the upper cabinets forward using a structural wood blocking frame behind the box, or select deep 15-inch custom enclosures.
Mistake 2: Insufficient Task Lighting
Deep upper cabinets cast dark shadows directly over your workspace, making it difficult to spot fabric stains.
- The Fix: Recess low-voltage LED strip lights into the bottom panel of the cabinetry to brightly illuminate the workspace below.
Mistake 3: Poor Material Choice for Backings
Using cheap MDF or particle board backings in a humid utility zone leads to sagging shelves and peeling paint within months.
- The Fix: Specify moisture-sealed solid hardwood framing or exterior-grade core plywood to withstand high humidity levels.
Future Design Trends in Laundry Cabinetry
The evolution of utility spaces focuses heavily on automation, sensory integration, and hidden ergonomics.
Motorized Drop-Down Shelves
High-end overhead systems now feature electronic motorized racks. With the touch of a button, the internal shelving lowers down to eye level, providing unparalleled accessibility for small laundry space solutions.
Integrated Air Purification
Modern upper cabinets frequently conceal built-in dehumidification channels and carbon air filters. These systems quietly eliminate damp odors right at the source, keeping your utility room smelling fresh.
Flush-Front Minimalist Facades
Touch-latches and integrated J-pull handles are replacing traditional external hardware. This creates flat surfaces that make small, narrow laundry zones feel larger and less cluttered.
Step-by-Step Cabinet Selection Protocol
Follow this structured protocol when purchasing and configuring your storage array.
- Measure Appliance Footprints: Record the exact height, width, and depth of your appliances, including the space needed for rear hoses and vent pipes.
- Locate Wall Studs: Use a high-density scanner to map out your studs, marking their positions clearly with painter’s tape.
- Choose the Core Hardware: Select your structural layout, choosing between solid doors, open shelving, or high-capacity internal pull-out systems.
- Install Safety Systems: Ensure child-proof magnetic locks are integrated if you plan to store dangerous chemical pods or bleaches on lower shelves.
Maximizing your vertical space with a thoughtful layout creates an organized, efficient workspace that streamlines chore day.
Next Steps & Resource Directories
Browse Full Directories
[Main Hub] > [Laundry Room Storage]
Related Articles
- Evaluating the Pros and Cons of a Pull-Out Kitchen Faucet
- Best Pull-Out Kitchen Shelf Ideas & Prices in Bangladesh
- 15 Modular Kitchen Design Ideas for Every Home Style Today
- How to Create the Most Efficient Kitchen Layout
